
Old Fashioned Red Velvet Cake
This Old Fashioned Red Velvet Cake is my grandma’s recipe and a long-time family favorite. The cake is soft and velvety and pairs perfectly with the light and creamy one-of-a-kind frosting, making this a true southern specialty.
This Old Fashioned Red Velvet Cake is a very special one. It’s my grandma Meme’s recipe and she would make this cake every year for my mom’s birthday. Meme is originally from Kentucky so I consider this a true southern red velvet cake. I’ve made this cake many times now over the years and have kept it just as Meme would always make it. This is a family favorite that I hope you’ll enjoy just as much as we have.
Red Velvet Cake
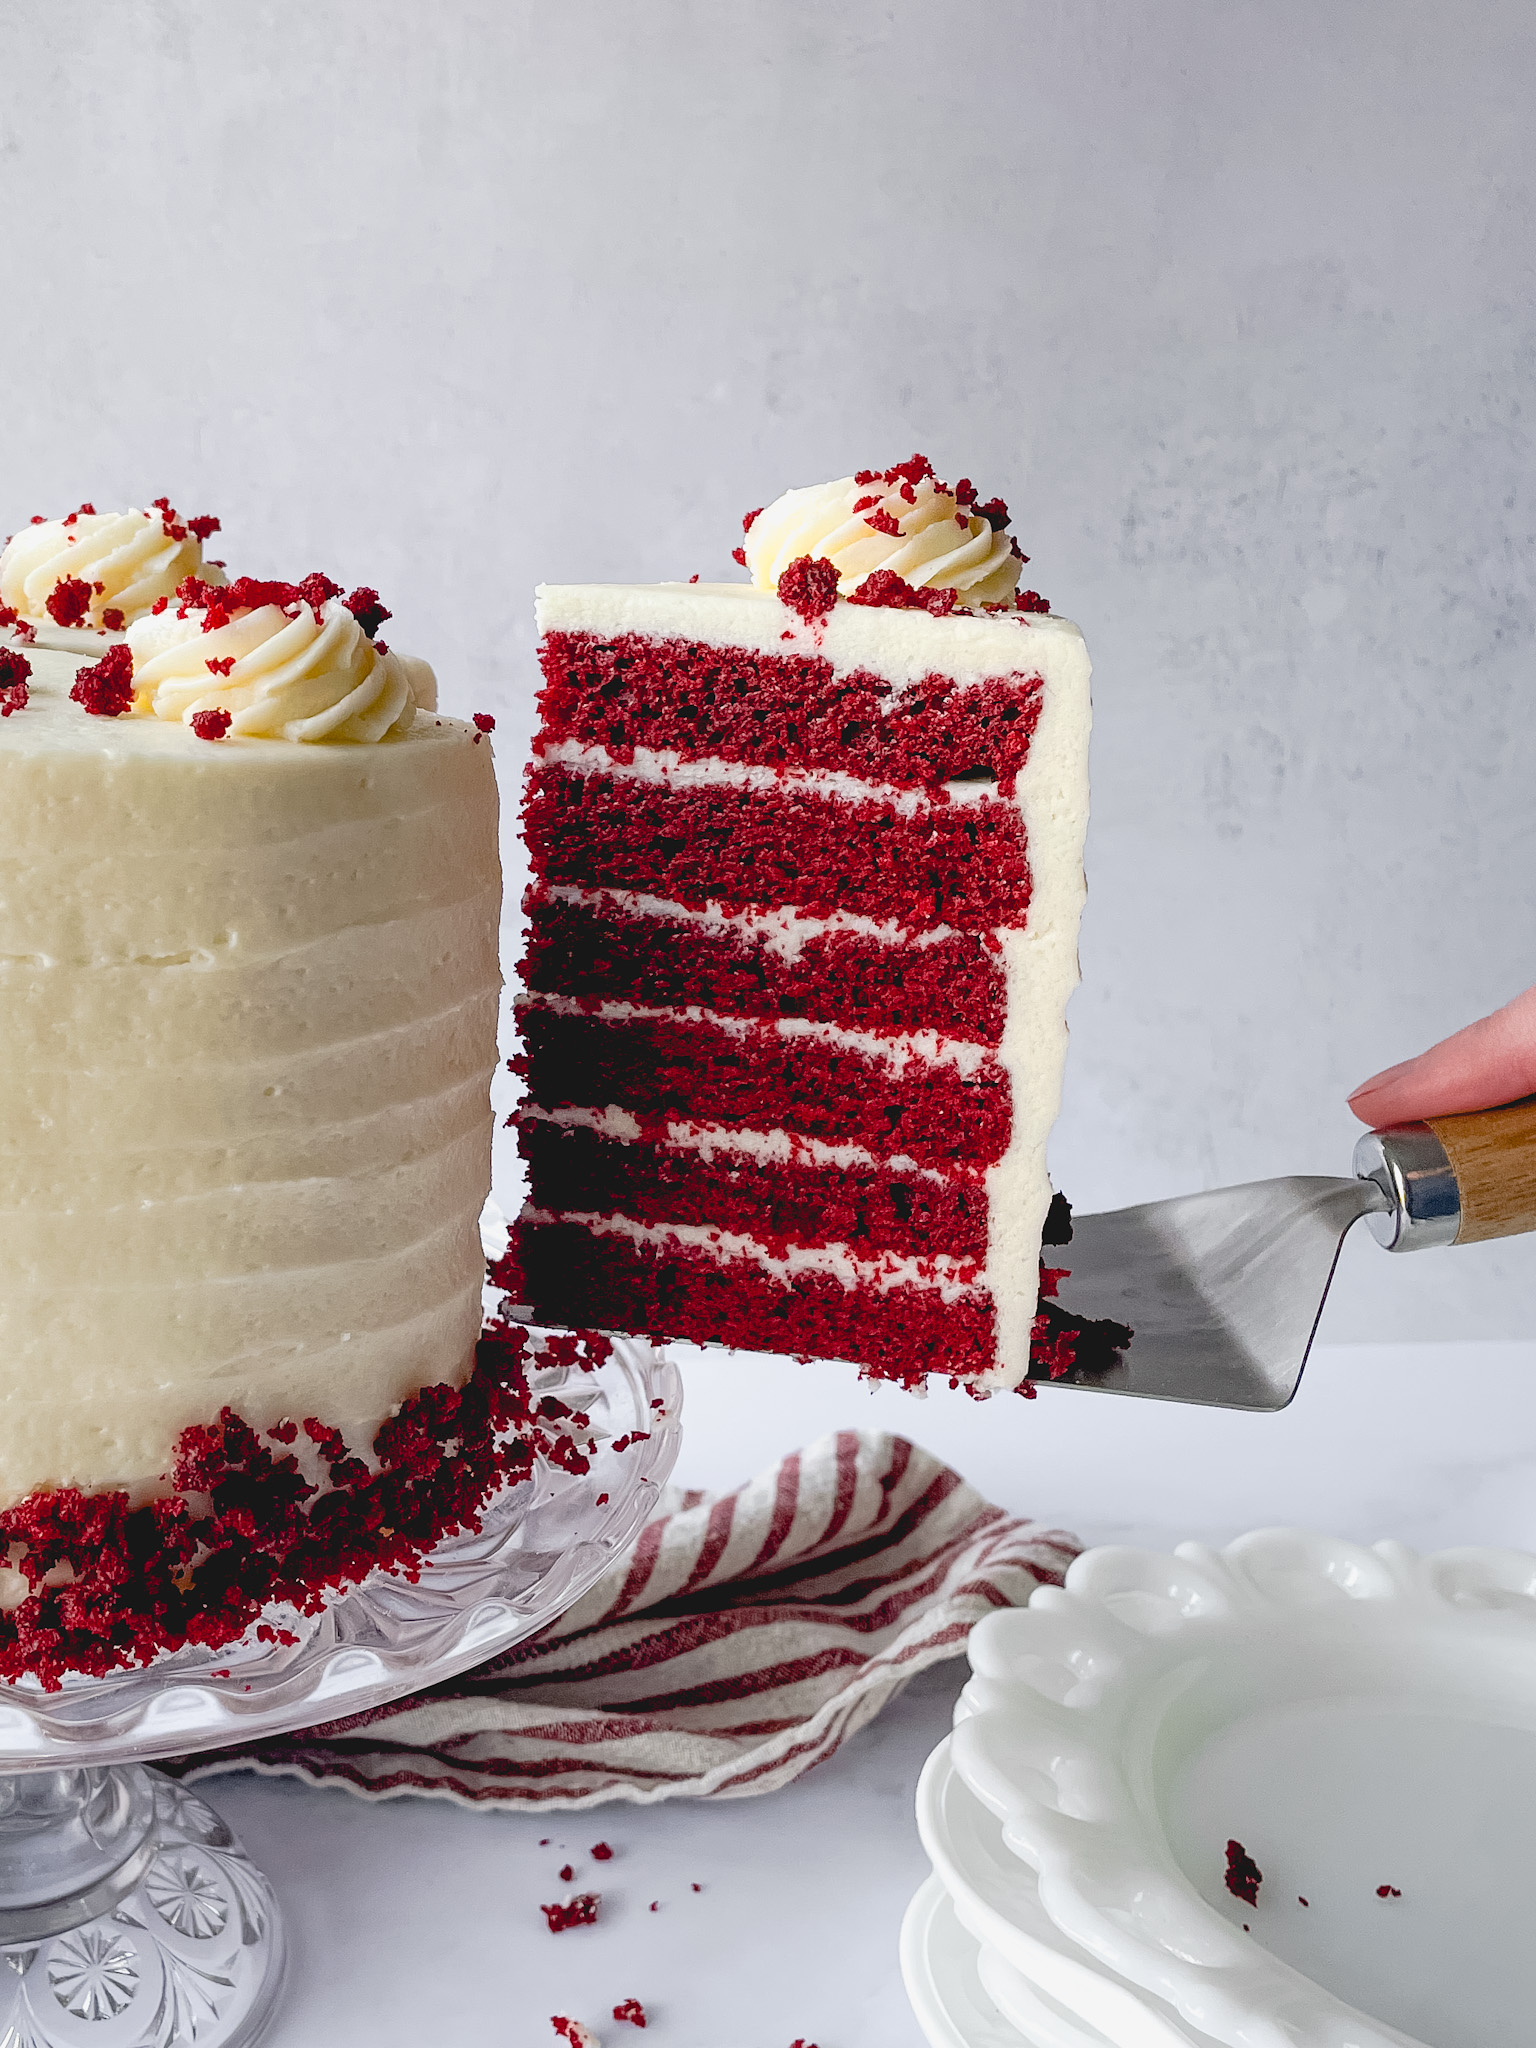
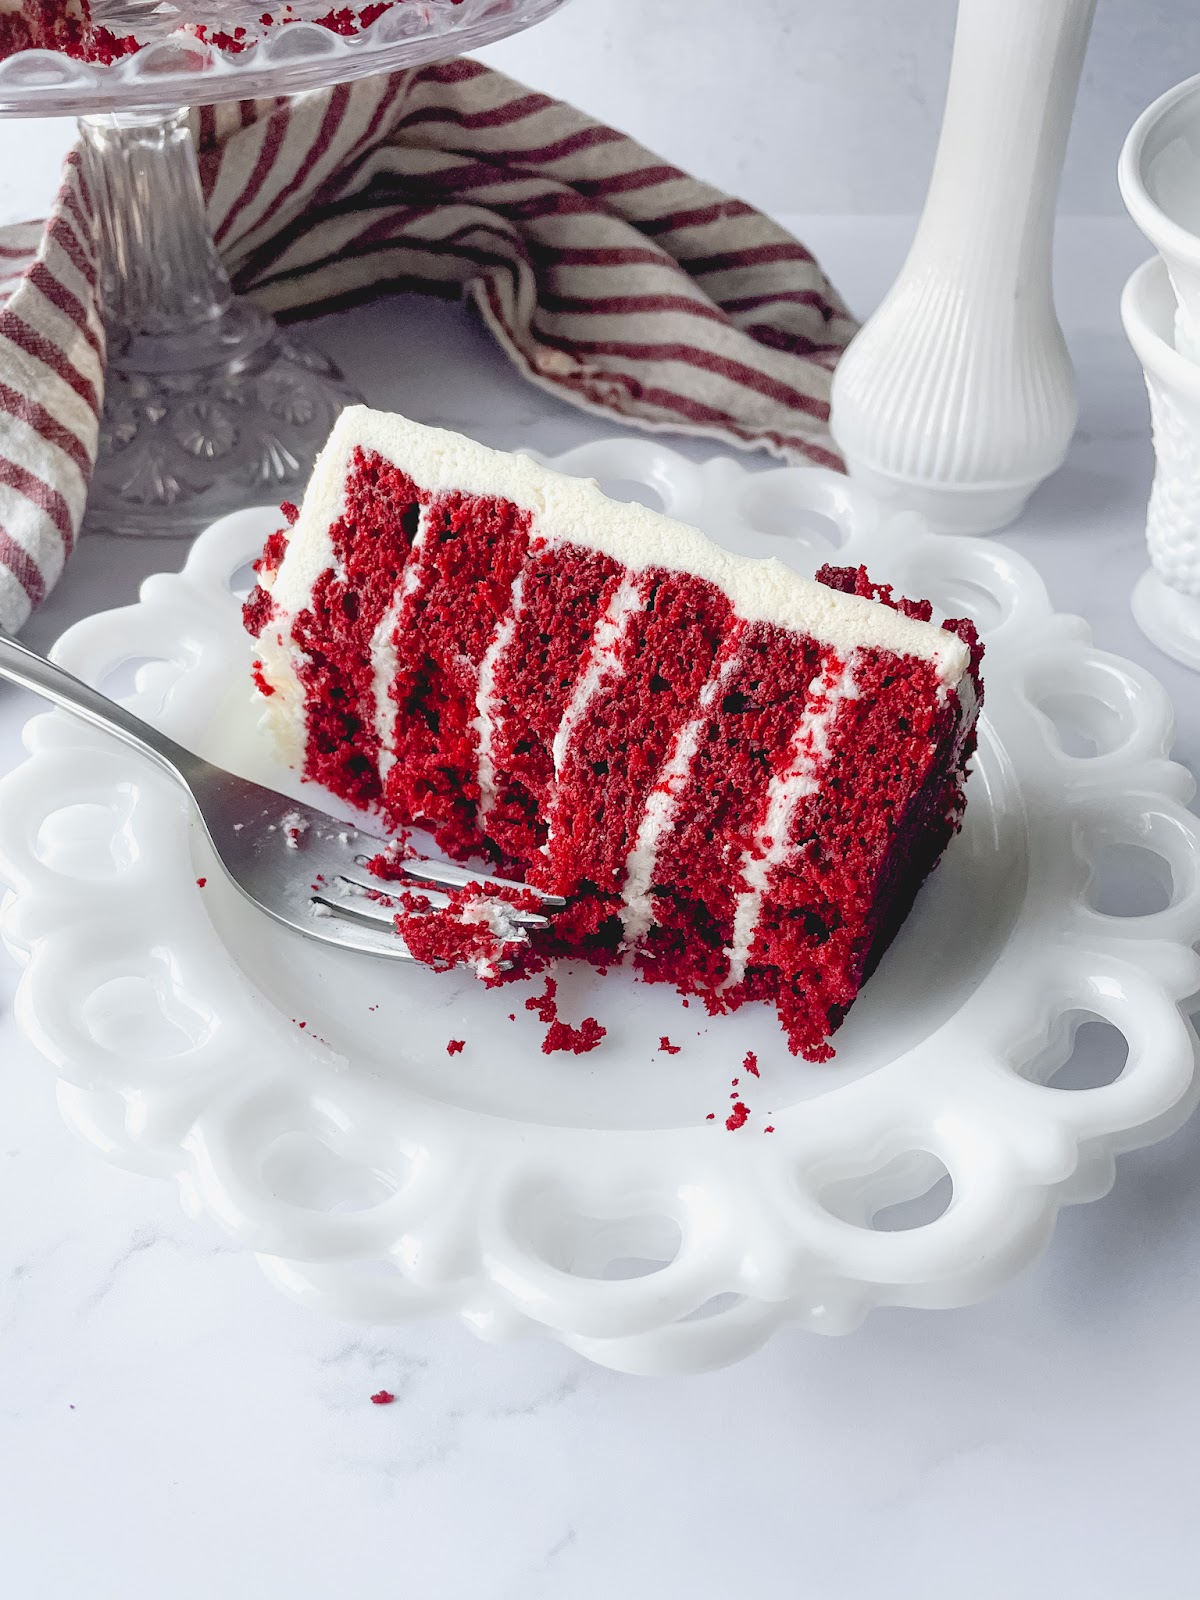
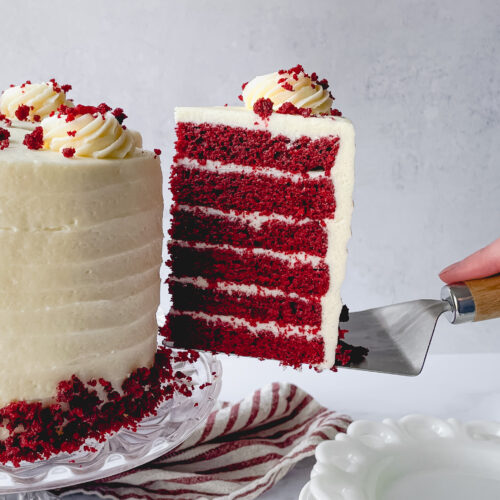
The red velvet cake layers are soft, moist, and velvety with a hint of cocoa and that classic deep red hue. Red velvet cake is essentially a mild chocolate-flavored cake, with red food coloring added. Buttermilk and vinegar are added and react with the baking soda to help the cake rise in the oven. I make three 6” round layers and cut each of those layers in half so you end up with a 6-layer cake that stacks up nicely.

Old Fashioned Frosting
I’ve deemed this icing “Old Fashioned Frosting” and it’s probably unlike anything you’ve had before. In all my years of baking and cake decorating, I’ve never seen a recipe quite like this one. Cream cheese icing is most often paired with red velvet cake. I like to think that this one-of-a-kind light and creamy frosting is the original icing that red velvet cake was intended to be eaten with.
The frosting starts by cooking cornstarch and water together on the stove to create what’s called a slurry. This thickens as it cooks and continues to thicken as it cools down to room temperature. Butter and sugar are creamed together, vanilla is added, then the cornstarch slurry is added slowly to the mixture. It all gets whipped up until smooth and ends up looking a bit like fluffy whipped cream. This icing is most similar to an “Ermine” icing or boiled milk frosting. These are made by combining milk and cornstarch, whereas my recipe uses water. A perk of using water instead of milk is that the frosting is fine to sit out at room temperature so the cake won’t need to be refrigerated.

Decorating
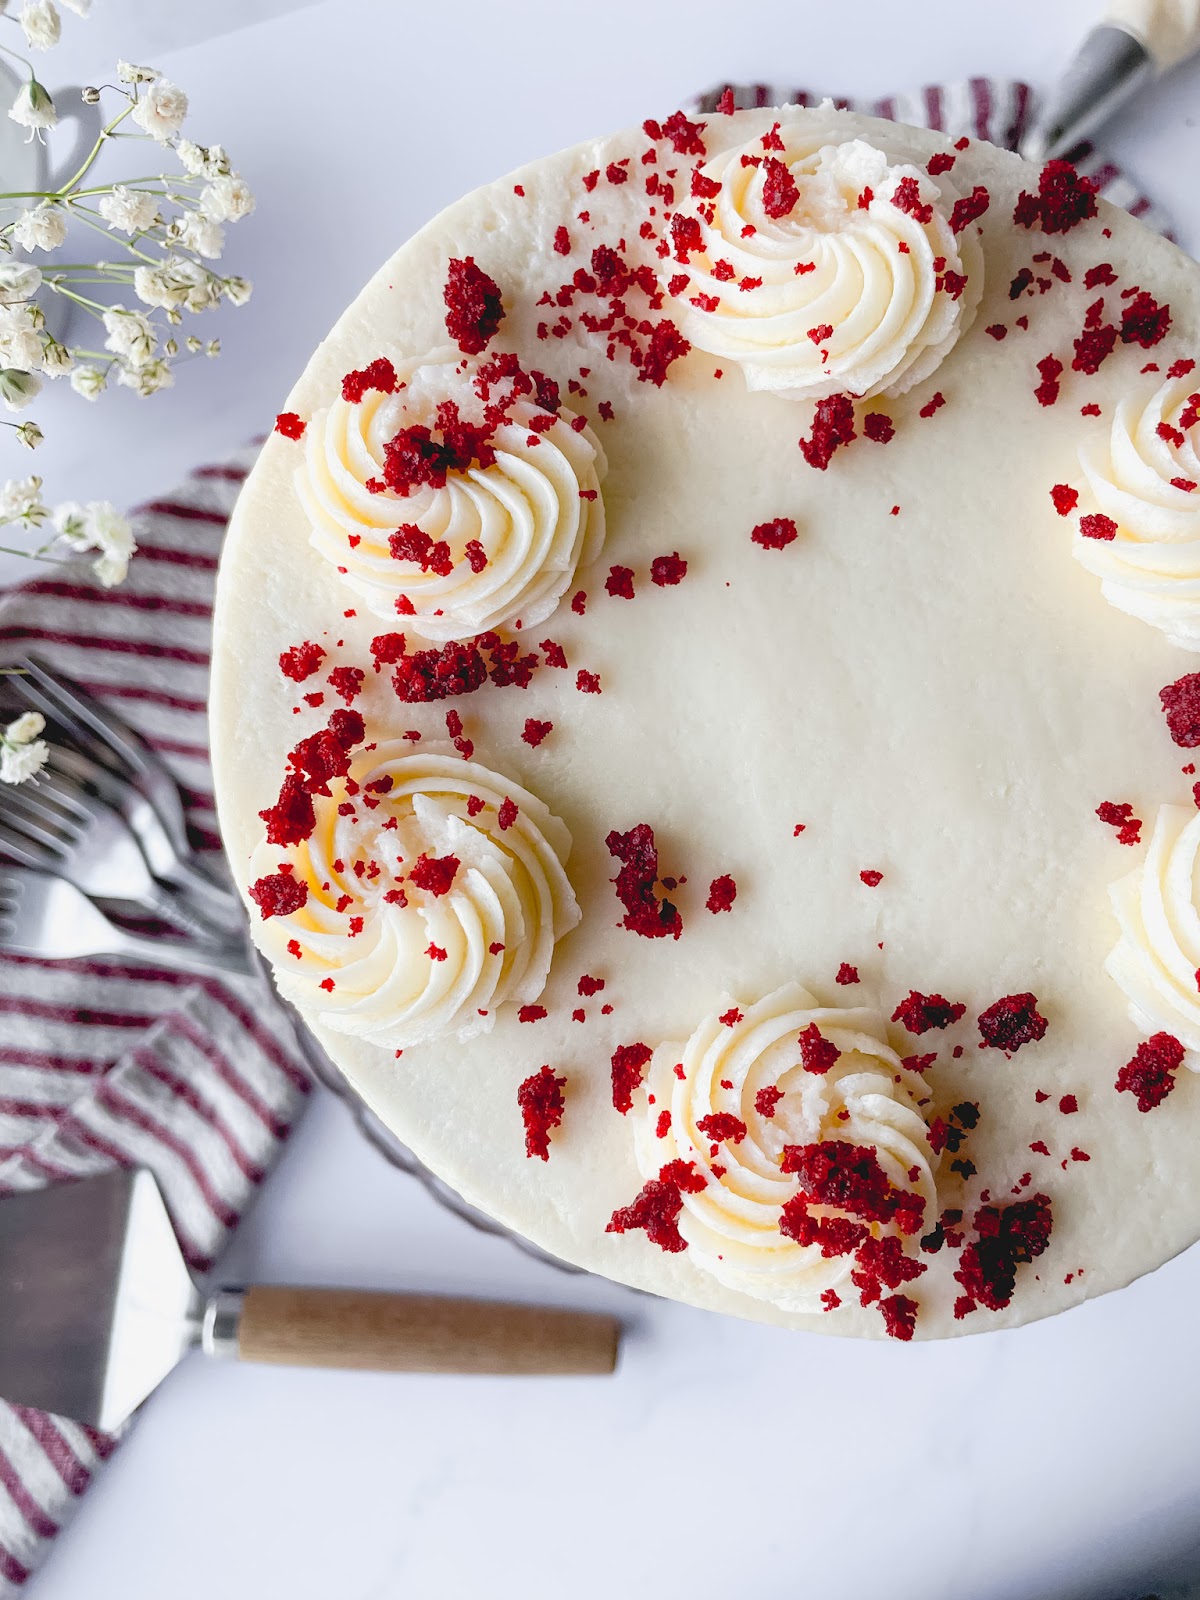
I like to keep the decorating simple with a ridged, ribbon-like texture on the sides of the cake. This design is done simply with a metal spatula. Add a few rosettes of frosting on the top and finish with red velvet cake crumbs for a simple, classy look. The crumbs are easy to make by breaking up the trimmed cake tops, lightly toasting them in the oven, and then crumbling them between your fingers. I press the crumbs into the sides of the cake, around the bottom edge, and sprinkle a few on top as well. The crumbs are a great way to use up your leftover cake scraps and a nice way to show what’s on the inside of the cake!
Recipe Video
Red Velvet Cake FAQs
Can I use gel food coloring instead of liquid?
Yes! You won’t need as much gel coloring as the liquid coloring that the recipe calls for. Start with a drop or two and add more if needed. My grandma’s original recipe calls for liquid coloring which I think was just what was available during that time so that’s what I’ve always used. The tiny bottles of liquid coloring can get expensive so I like to buy a big bottle of it to have on hand.
Do I have to use red food coloring?
The red food coloring is essential to get that vibrant color but doesn’t add any kind of flavor to the cake. I’ve never tried it myself, but beet juice or beet powder is often used as a natural alternative to food coloring. If you leave out the coloring altogether, you’ll end up with a light brown color, with maybe a slightly reddish tone.
How do I store the cake?
The cake can be stored for up to 3 days at room temperature, or up to 5 days in the fridge. If you’re keeping it in the fridge, be sure to pull it out about an hour before serving so the cake and frosting come to room temperature. I recommend keeping any cut sides of the whole cake covered in plastic wrap. You can also cut slices and store them in an airtight container.
Can I freeze the cake?
Yes! This cake freezes great. I’ve found that the best way to do this is to first cut the whole cake into slices, then wrap each individual slice in plastic wrap. Store the wrapped slices in an airtight container or zip-top bag in the freezer, for up to 3 months. Allow the slices to sit at room temperature overnight to thaw. This way you can pull one piece out at a time and enjoy it anytime!

Helpful tools
Kitchen Scale – The most accurate way to measure ingredients when you’re baking is with a kitchen scale instead of measuring cups. If you weigh a cup of flour, depending on how you pack it into the cup, it could be a different weight every time. With a scale, the measurement will be the same every time! I always include gram measurements (along with cups) in all my recipes and highly recommend using a scale. I also use my scale to weigh the batter into the cake pans so each one gets the same amount.
Cake Pans – The Fat Daddios brand has been a longtime favorite of mine for baking. A good, high-quality pan will make a big difference as the cakes bake. These anodized aluminum pans are the best I’ve found for your cakes to bake nicely and evenly. For this recipe, I used 3 of the 6” x 2” pans and then cut each layer in half to create 6 layers of cake.
Parchment Circles – You can cut circles from a roll of parchment paper but I love the convenience of pre-cut ones. They’re nice to have on hand and will save you a little time.
Serrated Knife – This may seem obvious for cutting your cake layers but not all serrated knives are the same. You probably have one in your knife block but it’s usually not long enough to carve through your cakes cleanly. This one has a long 10” blade to glide right through the cake layers for a smooth, even cut. It’s also great for slicing bread!
Cake Turntable – A turntable will make cake decorating a much easier process. I don’t believe you need many tools to make a nice cake but a turntable is one I highly recommend. This metal Ateco one is my favorite. It even comes with a nonstick mat that helps keep your cakes from sliding around. It’s a bit of an investment but totally worth it in my opinion.
Offset Spatulas – The only other tool you really need for cake decorating, besides a good turntable, is an offset spatula. You can still create fun and beautiful designs without piping bags or tips by just using an offset spatula. In this set of three, I like using the middle size for filling and frosting the cake and the smallest one for finer details and designs. The largest size is good for bigger cakes that are wide in diameter or very tall.
More Cake Recipes You’ll Love
- Raspberry Orange Pistachio Cake
- Chocolate Peanut Butter Snack Cake
- Vanilla Cupcakes With Chocolate Frosting
- Chantilly Crepe Cake
- Strawberry Crunch Cheesecake
Lastly, if you make this recipe, be sure to leave a comment below and tag @sweetkitchencravings on Instagram or TikTok. Or if Pinterest is more your style, you can save my recipes to your collection there. Happy baking!
Old Fashioned Red Velvet Cake
Ingredients
For the Red Velvet Cake
- ½ cup (1 stick or 113g) unsalted butter, at room temperature
- 1 ½ cups (315g) sugar
- 2 large eggs, at room temperature
- 1 teaspoon vanilla extract
- 1 Tablespoon (8g) cocoa powder
- 2 ¼ cups (290g) all-purpose flour
- 1 teaspoon baking soda
- 1 teaspoon salt
- 1 cup (242g) buttermilk, at room temperature
- 2 oz (56g) liquid red food color
- 1 teaspoon white vinegar
For the Old Fashioned Frosting
- 3 Tablespoons (30g) cornstarch
- 1 ½ cups (325g) water
- 1 ½ cups (3 sticks or 339g) unsalted butter, at room temperature
- 1 ½ cups (315g) sugar
- 2 teaspoons vanilla extract
Instructions
- Red Velvet Cake: Preheat oven to 325°F. Lightly grease three 6” round cake pans with cooking spray and line the bottoms with parchment paper circles.
- In the bowl of a stand mixer fitted with a paddle attachment, cream the butter and the sugar until fluffy and light in color, about 3-5 minutes.
- Slowly add the eggs one at a time and vanilla, combining well after each addition. Mix in the cocoa then scrape the bowl well with a rubber spatula. Mix on high for an additional 30 seconds until the mixture is smooth.
- Combine the flour, baking soda, and salt then combine the buttermilk, red food coloring, and vinegar. Alternate adding the flour and buttermilk mixtures, starting and ending with the flour. Mix until just combined after each addition and scrape down the bowl a few times during the process.
- Divide the batter evenly between the three cake pans. Bake for 25-30 minutes, or until the cake springs back to the touch or a toothpick comes out clean.
- Cool the cakes until they are cool enough to handle then remove them from the pans.
- Old Fashioned Frosting: In a small saucepan, combine the water and cornstarch and cook over low heat until the mixture thickens and starts to boil. Strain the slurry mixture, press plastic wrap directly onto the top, and set aside to cool to room temperature.
- In the bowl of a stand mixer fitted with a paddle attachment, cream the butter and the sugar until fluffy and light in color, about 5 minutes. Add the vanilla and mix.
- Switch to the whisk attachment. Once the cornstarch slurry has cooled to room temperature, add a little at a time to the mixing bowl, while running on medium speed. After all the slurry has been added, turn the mixer on high speed and whip until smooth.
- Assembly: Once the cakes are cool, slice the top off of each cake layer to make them level then slice each layer in half horizontally, to create 6 even layers.
- Break up the cake tops into small pieces and place them on a baking sheet. Bake at 300°F for about 5 minutes, until they start to dry out slightly. Allow the cake pieces to cool then rub the pieces between your fingers to create coarse crumbs. Set aside.
- Place the first cake layer, cut side up on a cake board or cake stand. Add about ½ cup of frosting and spread it out to the edges. Place your next cake layer on top, gently press down, and repeat the same process for the remaining layers. On the last layer, place the cake layer cut-side down.
- Crumb-coat the cake entire cake with a thin layer of icing and refrigerate for about 20-30 minutes. Apply a final thicker layer of frosting all over the top and sides of the cake and smooth it with an offset spatula.
- Turn the spatula horizontally and using the top rounded part, lightly drag it along the sides of the cake starting at the bottom and slowly working up to the top, to create a pattern on the sides of the cake. Press some of the red velvet cake crumbs up the sides of the cake.
- Fit a piping bag with a star tip and fill it with any remaining icing. Pipe rosettes on the top of the cake and finish with a sprinkle of more red velvet cake crumbs. Slice and enjoy!

I was looking for a historically authentic red velvet recipe. This is just what I was looking for. The cake tasted amazing, though I did not try the frosting recipe given here. If you want to try a true red velvet cake, this recipe is a perfect one.
Thank you Jackie! I’m so happy to hear you loved the red velvet cake and I appreciate you trying my recipe 😊
Thanks I made for my granddaughters birthday. She loved it. My Mom used to make them. I didn’t get her recipe😔
I’m so happy to hear your granddaughter loved the cake! So glad I can share my family’s recipe with yours ❤️
I would love to try this recipe but I have to make a 9×13 sheet cake. How do I tweak this recipe to do that? The current recipe for 3- 6″ cakes seems too little to do even one layer for a sheet cake. Can you help please?
Hi Carissa! For a 9″x13″ pan I recommend doing a 1.5 batch. If you want to make two thick layers to fill and frost like a sheet cake, you’ll probably want to do a double batch and split it between 2 pans. Hope this helps!
Hi! I had the same question here – how long do you think to increase the bake time for a 9×13 pan?
Hi Jaylee! The baking time will depend on how full the pan is but I think one batch would be plenty of batter for a 9″x13″ pan. I’d start with 30 minutes but I think it could take around 30-35 minutes bake time in total. Hope this is helpful!
Does the icing require refrigeration??
Hi Sarah! No, the frosting does not require refrigeration and can be left at room temperature for up to few days. Hope this helps!
I will be using this recipe to make a large 11″ round cake, big enough to feed 30 people. How would you adjust cooking times for 4 – 11″ cake pans that are 2″ deep?
Hi Jordan! The baking time will greatly depend on how much batter you are adding to each pan but I would guess for an 11″ round, it will take at least an 1 hour (if not more) to bake. Always test the cake for doneness though – the cake should spring back when you gently press the center or a knife poked into the middle should come out mostly clean with no wet batter. I would also suggest using a heating core to help the center bake faster and more evenly, which can be purchased on Amazon for under $10. Hope this helps!
Hi Rachel,
I would like to make this recipe, but don’t have a stand mixer. Are the instructions any different for a regular hand mixer? Please let me know, thank you!
Hi Brenna! Hand mixers aren’t quite as powerful as a stand mixer so I would recommend increasing your mixing time a bit to ensure the get ingredients well blended. This is most important when you cream the butter and sugar together, for both the cake and the frosting. Hope this helps!
The cake is an absolute hit I’ve made it about 5 times in the past 3 months and not one person said no. However I find the frosting to be a hit or miss sometimes it turns out perfectly and sometimes the granulated sugar seams to stay gritty please help! Thank you again for sharing this recipe
So glad to hear you enjoyed this recipe Jessica!
not so sure your flour weight is correct. 2 and a quarter cups is around 343g, give or take.
Hi Amanda! Thank you so much for pointing this out. It should be 290 grams which is right around 2 1/4 cups. I fixed this in the recipe and really appreciate you letting me know!
I was wondering how I would use this recipe for 3 9 inch rounds? Would I double recipe?
Hi Maria! Yes, I recommend doubling this recipe to make it into three – 9″ rounds. You will also need to increase the baking time for this size.
Can you make this recipe into cupcakes? If so, what would you recommend for baking time?
Hi Janice! Yes, these can be made into cupcakes. I would start with 18-20 minutes and add time (2 minutes at a time) from there if needed!
hey rachel!
id love to try this recipe out but i have a question, are the metric measurements accurate? shouldnt one cup and half of sugar be around 250 grams? would love to know, thank you!
Hi Ashley! 1 cup of granulated sugar weighs about 200 grams, so 1 1/2 cups is around 300 grams so this measurement is correct. Hope this helps 🙂
Agreed! But its written as 315g on the recipe, and the flour is 290g when according to my calculations 🤓👆 it should be 270g? I’m probably wrong, so please let me know which system you used when you developed the final prototype of this recipe!
I always recommend weighing your ingredients rather than using cup measurements. I provide those for anyone that may not have a scale but weight is more accurate and is what I personally use to develop my recipes. 1 cup of an ingredient can weigh a little different every time so the gram measurements are definitely the way to go for more consistent results!
got it! thank you so much for your time!
This was always my birthday cake. Since I was born in July my mom would dye a portion of the icing blue for the cake would be red, white and blue. Now for my son’s birthday he asked for the red Waldorf cake so I just finished making his.
So glad I can share my family’s recipe with yours Patty!
I had this 50 years ago and lost it at some point, so thank you.
Have you had success with cupcakes rising just fine? I like to freeze them for company.
Thanks.
I’m so glad I could bring back a longtime favorite recipe for you! I don’t think I’ve ever tried the batter as cupcakes but I think it would work just fine!
Hi Rachel, I have two 8″ pans. Do you think I could use the same recipe and it would work?
Hi Matina! Yes, I think two 8″ pans would work well for one batch of batter. You’ll just want to increase the baking time a bit since the layers will be thicker.
This recipe is absolutely perfect! I made this for my son’s friend for her birthday and she was delighted. I’m going to make it again for another birthday. Thank you for sharing this wonderful recipe.
Thank you so much for your sweet words! I’m glad to hear everyone enjoyed the cake!
Would this be enough batter for two 9 inch pans ?
Hi Paula, I think one batch would would be enough to fill two – 9″ pans but they would on the thinner side. I’d probably do a 1.5 size batch if you’re wanting thicker layers. Hope this helps!
This cake took me back to sitting on my 80 year old neighbor’s swing gossiping about anything and everything! It taste so much like the ones I grew up with. The icing is what really sits this recipe apart! I know it’s a little different than the usual icing recipes, but man it is worth it!! So, so, so good!
Thank you Rebecca! The frosting truly is a special one! I absolutely love hearing how much you enjoyed this! ❤️
Could you elaborate more on what you mean during the straining of the cornstarch in making the icing?
Hi! You’ll want to press the cooked cornstarch mixture through a fine mesh strainer, just to catch any lumps that may be in it. I find that it helps keep the frosting smooth and lump-free. Hope this helps!
Do you know if I could scale up this cake to serve 40 people?
Thank you! 🙂
Hi Ana! Scaling up the recipe should work just fine. 3 batches in total would be plenty, although you’ll probably have to make them separately since that much batter won’t fit in a stand mixer all at once. You’ll want to bake it into either a round 3-layer 10″ cake or a large sheet cake. Hope this helps!
Seems very close to my mothers recipe and I’m 72.
Hope you enjoyed it just as much as her recipe! 🤍
Hi can I use this recipe for cupcakes? Is there anything I need to tweak? besides checking on them every couple minutes for being full baked. I really like this recipe the best, I am making them for a friend’s wedding.
Hi Alex! Yes, you can make this recipe into cupcakes. I would just reduce the baking time – start with 18-20 minutes and add 2 minutes at time after that, if needed!
Does this cake tier well? Any special notes? First time trying a 2 tiered cake and am not sure what to look out for
Hi Jackie, I have used this recipe on tiered cakes and haven’t had any issues with it. Nothing to note for this recipe specifically. With all tiered cakes, I’d say one of the most important tips it to use support (thick straws or dowels) on the bottom tier, as well as one big dowel through the center of both tiers. Chelsweets has some great youtube tutorials on tiered cakes. Hope this helps – best of luck!
is there any way I could make this into a 9 inch cake?
Hi Jackie, one batch would would be enough to fill two – 9″ pans but they would on the thinner side. I’d probably do a 1.5 size batch if you’re wanting thicker layers.
Hi, I have made this recipe in the past and loved everything about it. This time around tho my icing broke. Any suggestions on how to save it?
Hi Lisa, I’m sorry to hear your frosting didn’t turn out this time. I find this happens occasionally due to temperature (like if the butter was too cold). I recommend melting about a tablespoon or two of the icing in the microwave, then add it back to the rest of the icing and continue to whip it until the mixture comes together. This usually does the trick – hope this helps!